Bird Photography
What is the best way to photograph the birds that may be in your area? I’m going to give you several tips, which will help you in your bird photography, and I hope you find them helpful.
1.The Right Gear
The fundamental tip that I can pass onto you which is ever so important is to have a camera that will capture action at high speed if you are wanting to capture birds in flight and then it is equally important to have a super sharp lens that will give you the clarity in the picture.
It can be tempting to buy a cheap lens and save a few dollars but you will be disappointed when it comes to enlarging your picture.
If your pictures were just to remain at postcard size, then you might get away with a cheap lens but if you are waiting to display your work, to show case it, or to print pictures for clients and friends then at the end of the day you need a set up that is going to work for you. Cheap lens will not cut it generally.
Even on our photo tours we see this where some guests will cut on the cost of a lens as they don’t want to outlay for an expensive lens. I do understand that we are all on a budget but at the end of the day you need to ask yourself how sharp do you want your images to be. You don’t have to sell you house to get a good set up for bird photography.
If you are a person who wants sharp images then you have no option other than to invest in a good lens that will help you capture sharp images.
On one of our Africa Running Wild Safaris trips I had a guest who had an outstanding Nikon lens, which was super sharp and really made for capturing African wildlife and birds. He also had a very cheap lens which in compassion, it just didn’t rate and the lens didn’t even come close. He would ask me what lens to use at times and I would always say, “there is no comparison. You have the lens on your lap that will do the job for you.”
He would often go back to the cheaper lens, as it was much lighter and more convenient to use. Were the images sharp and worth printing up large. Short answer is no.
You don’t have to sell your house to buy gear that will give you top results ( more about that later) but it is worth waiting for a while to save up for a really good lens that will do justice to your photography.
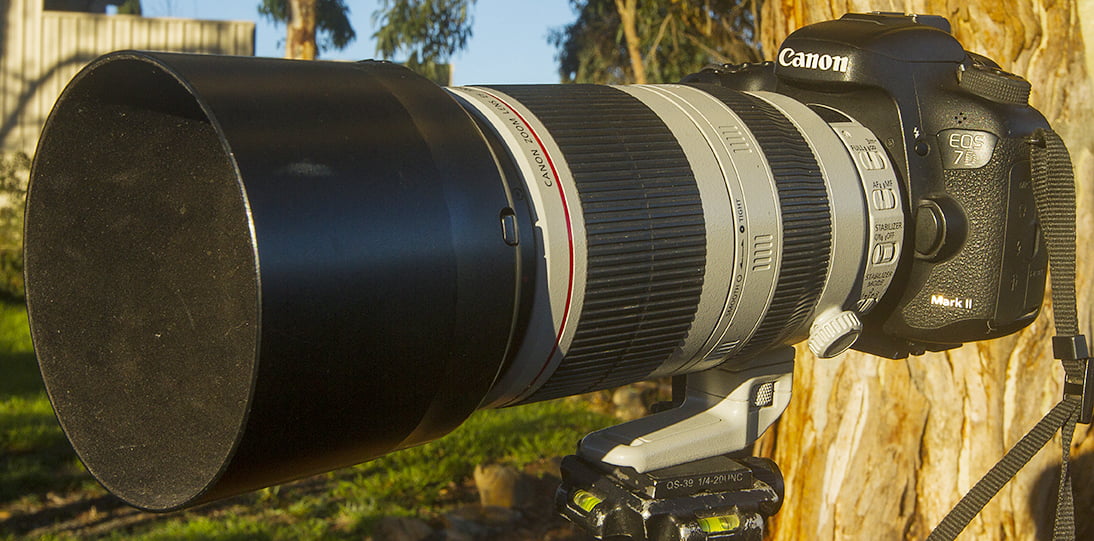
We use the 7D mark2 as this is 10 frames a second and we also use the 100-4005.6 mm Canon L series Lens. For us this is the perfect set up for Bird photography and wildlife. When we go to Africa , this is what we shoot with. When you have seen the various blogs on the African trips, this is the set up.
2. Get Close
Depending on your lens and the reach to the bird, with any type of photography and in particular birds, it is important to get as close as you can. The blue wren is a wonderful Australian blue small bird that stands out in the crowd due to its vivid blue colour. However due to its size it is really important that you try and fill the frame as much as you can to give detail to your shot. There is no point in photographing the Blue Wren if it is going to be small in your frame. The bird would only stand roughly 6 cms tall.
Clearly photographing a pelican or larger birds is a much easier task and won’t be the same challenge to fill the frame.
In order to do this you need to be patient and that is number 3
3. Patience
Any wildlife photography requires patience and patience and sometimes more patience.
When you see a great wildlife picture, 8 times out of 10 that shot is a result of the photographer displaying patience. It is that simple, not rocket science but how many people can actually sit and wait, wait and wait again. Patience is so important.
If you have ever tried capturing your favourite bird or any bird for that matter, you will know how hard it is. When you see a bird shot that you admire that someone else has taken, you will be able to fully appreciate what has gone into capturing that shot.
Bird photography is about putting the hard work in to gain the rewards. Rarely is it going to be just given to you on a silver plate.
I will say however, there are moments when you are at the right place at the right time and you have just arrived and there it is. This does happen but it is not the norm. When it does happen , it’s awesome.
4. Your Backyard
In order to get into the zone and to know what it takes to be able to take those amazing bird shots, look to see what is in your own back yard. I suggest this, as you’ll see that birds that hang around in your back yard are sort of use to you and also being in your back yard it is a little easier to observe their patterns of behavior.
When you are not taking pictures of the birds, just observe them and see what they do. Often they will repeat the same habit of behavior and this will give you a heads up when knowing when to take the picture. The study of bird behavior is so important as there will be times when you will be able to predict what they will do next. This is true in the 4 legged animals as well.
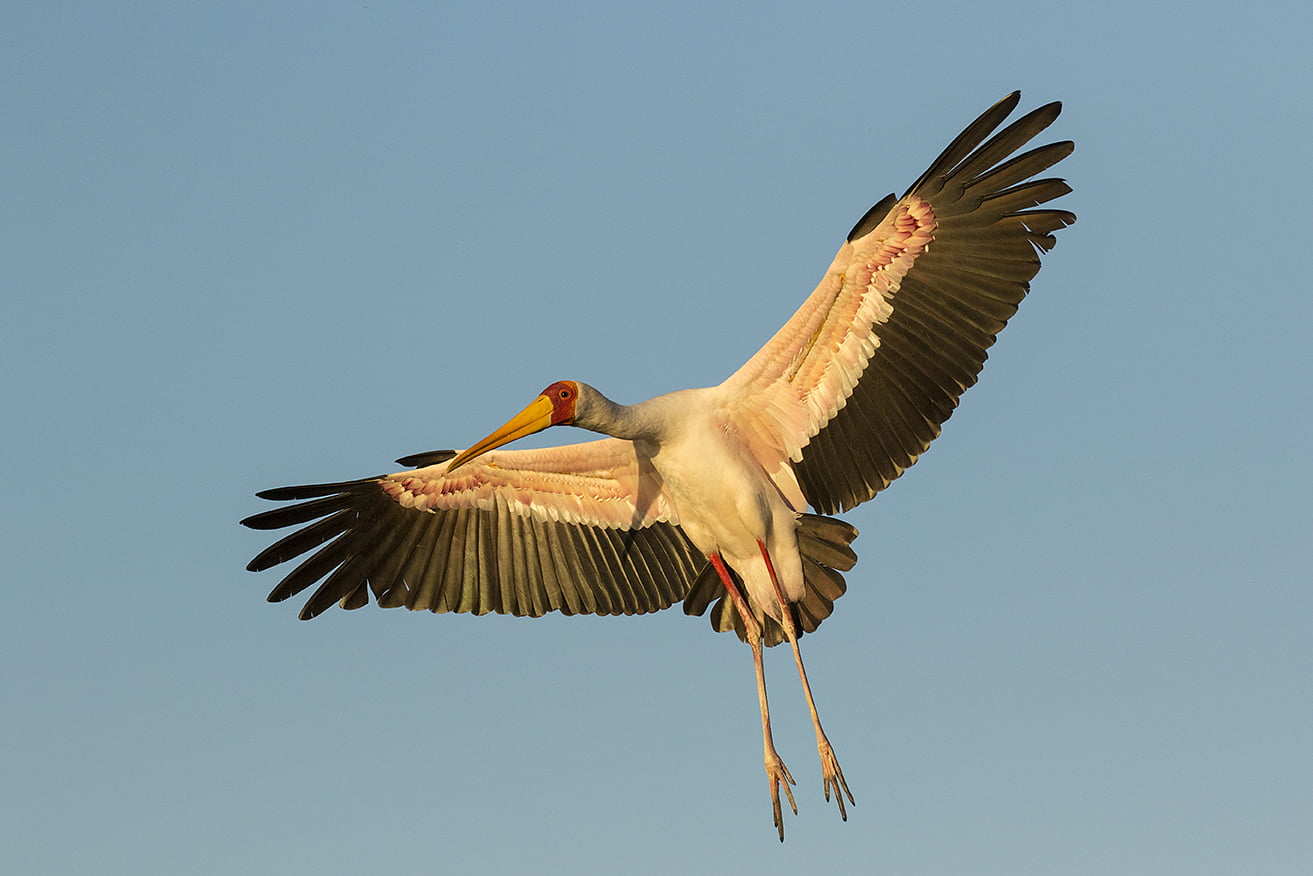
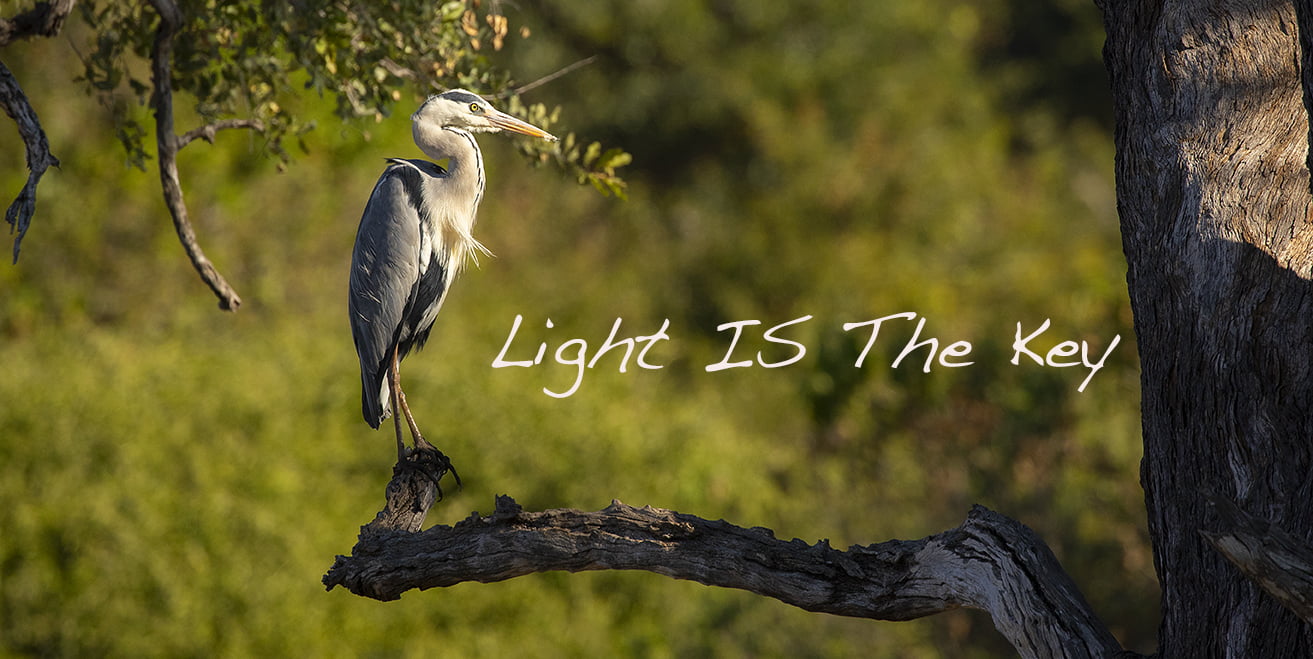
5. The Light
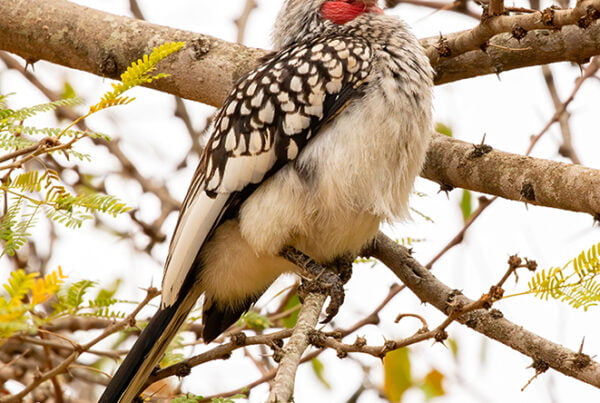
As with all photography, light is the key and the same is of bird photography. Clearly you can shoot bird photography at any time during the day but also for that extra result, photographing the birds early morning and late afternoon with the amazing light at this time will give you an edge in your pictures. Not only will you have the nice light on the bird, but also you will be in a position to have the catch light in the eyes.

Catch light is so important as it makes the birds come alive even more in your pictures. There are times when it is not possible I know but when it is there, you need to be patient. There is that word patience again, to wait for the bird to turn so you can get the catch light in the eyes.
There are examples below.

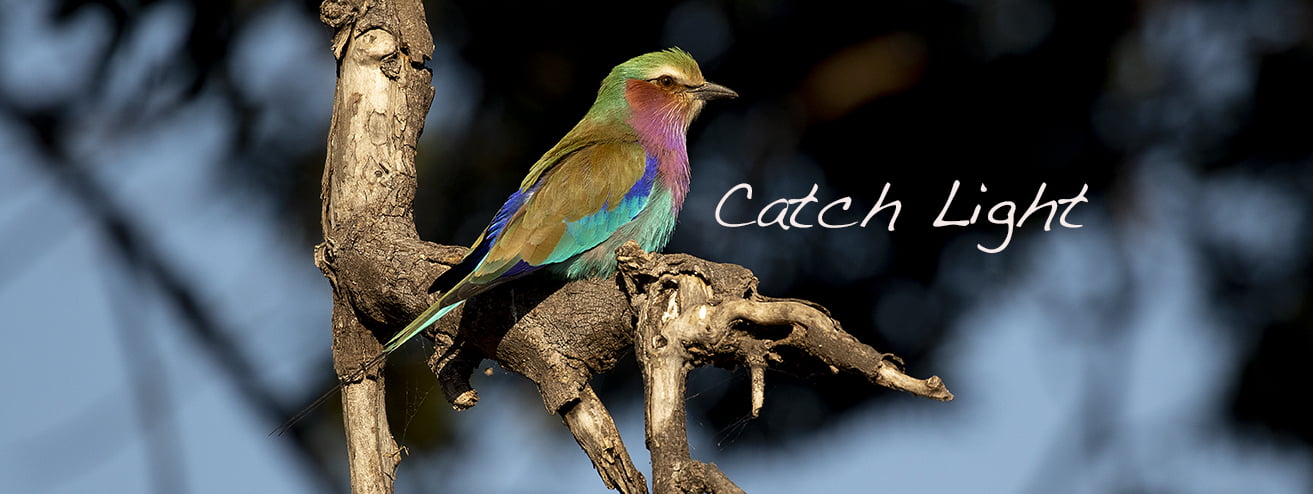
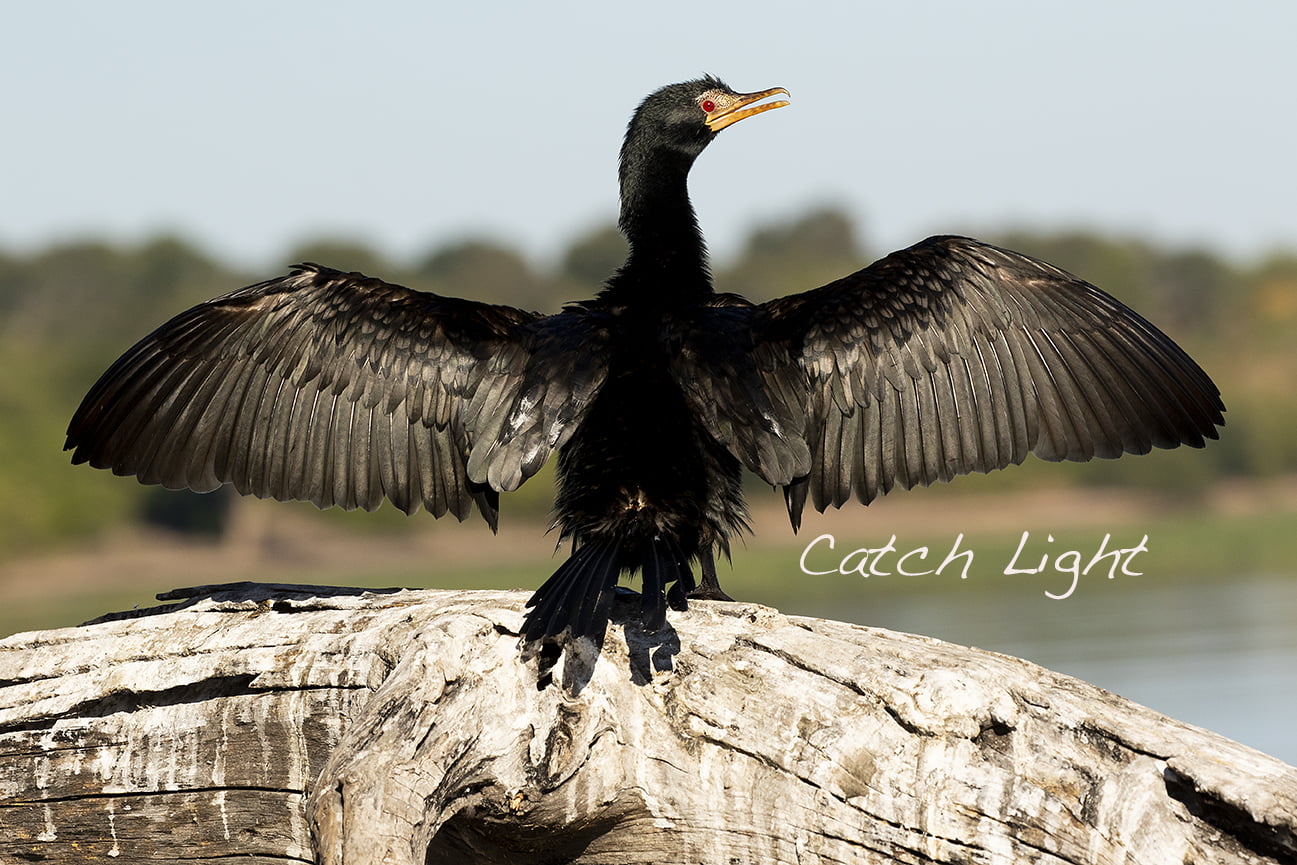
When running any of our photo tours and in particularly our Africa Running Wild Safaris,(you can find that at www.africarunningwildsafaris.com.au) birds make up a large section of the photography in the first few days if you are doing the Botswana section of the tour. When we are all on the water, what is stressed is the catch light in the eyes of the birds. Often when we are in the boat, we are quiet as a mouse and we often say to the guests, just wait for the right time when the bird turns to get the catch light in the eyes. It makes the world of difference and it will change and add a new dimension to your pictures.
The Catch light will make the image come alive and it will give you so much more depth to your picture. The window to our soul whether it be humans or animals and birds, are the eyes. The eyes are the most expressive organ that the body has, therefore with any photography that has eyes, you should try your best and capture the eyes at their best and a simple way of doing this is through catch light. Timing is everything.
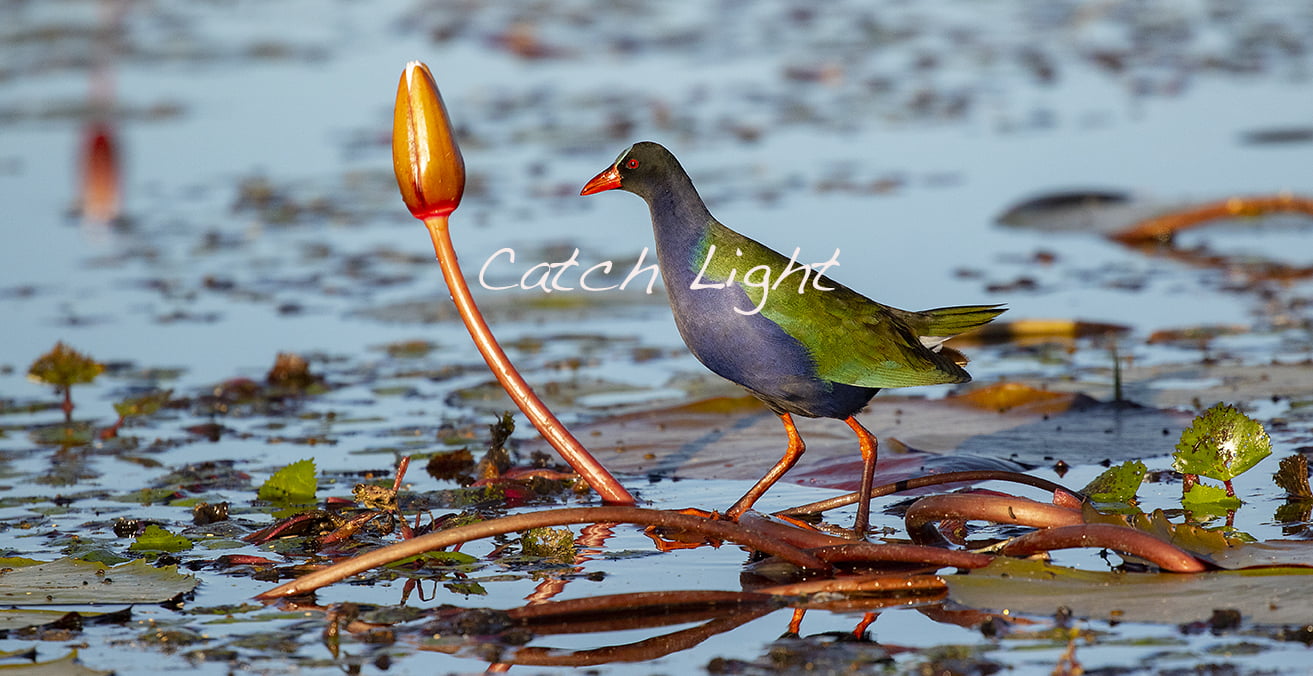
Catch light is simply the sunlight in the eyes of the bird or other animals as the concept is the same not matter what breathing creature you are photographing.
There is a cheat’s way where some people will add the catch light in the eyes of their pictures through post production work but I prefer to achieve the result by shooting the authentic catch light that nature gives us. For me there is the satisfaction of capturing the catch light authentically.
There is no substitute for making your images as authentic as you can.

6.Exposure
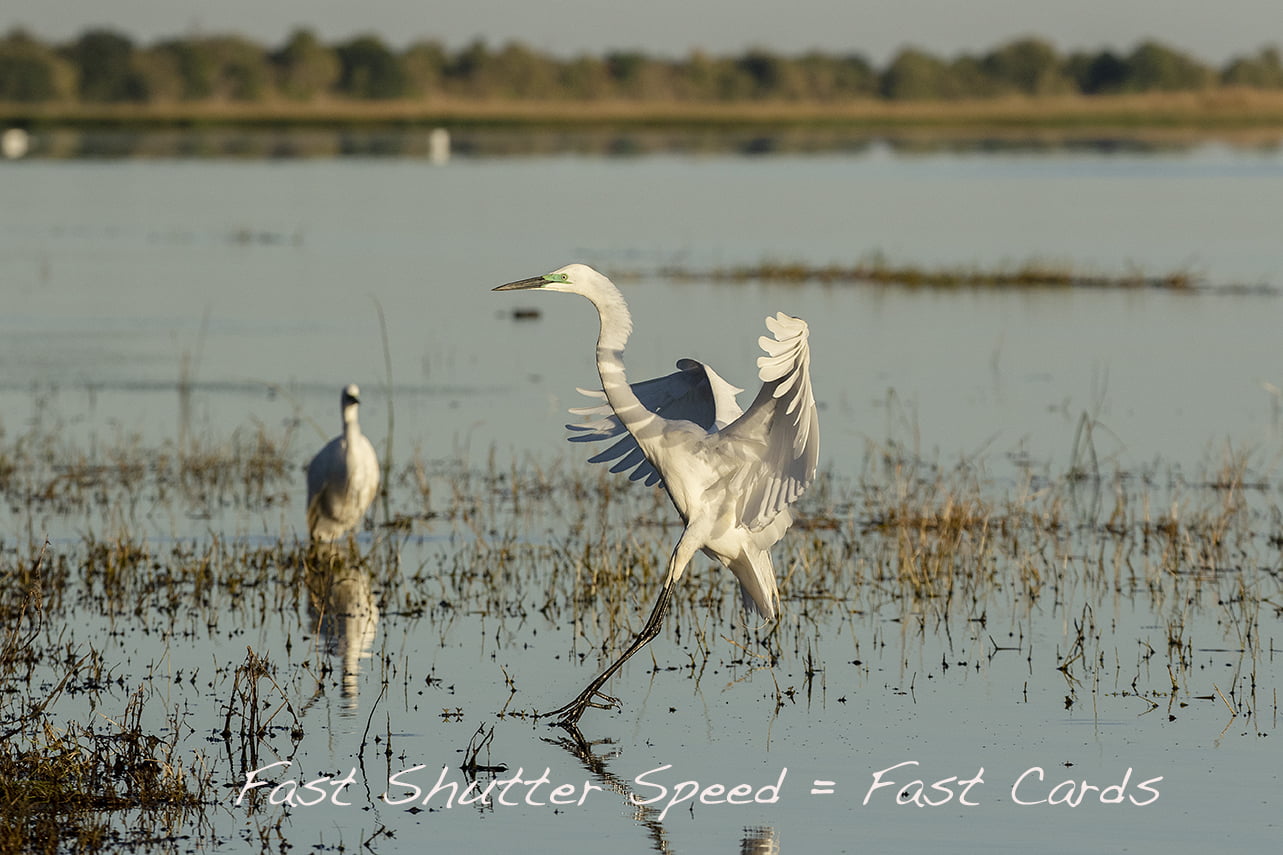
When it comes to exposure we photograph all of the birds in Av mode and not manual. We also under exposure between ½ to one stop. We do this for several reasons.
By under exposing you are not going to have any blow outs or blinkies in the picture, particular if the bird is white, like egrets. Also by under exposing you actually gain a shutter speed which is important when it comes to wanting to freeze the frame.
7.Know Your Camera.
Know your lens and know what they can do. This is so important when it comes to capturing your bird photographing.
As I mentioned we shoot in AV as I know if I chose an aperture of 5.6 or 6.3, ISO 400 and I’m on a sunny day, I know that my shutter speed is going to between 2500-4000 depending on the conditions and they are the speeds that I require to freeze the action.

Being at f5.6 or f6.3, means your focus has to be spot on and if you are using a good lens, it will be. Use a cheap lens, no it won’t be for a numbers of reasons.
The cheaper lens cannot track focus as quick as the better lens that cost a little more.
So it’s important to understand your camera, know its strengths and know its weaknesses and so on.
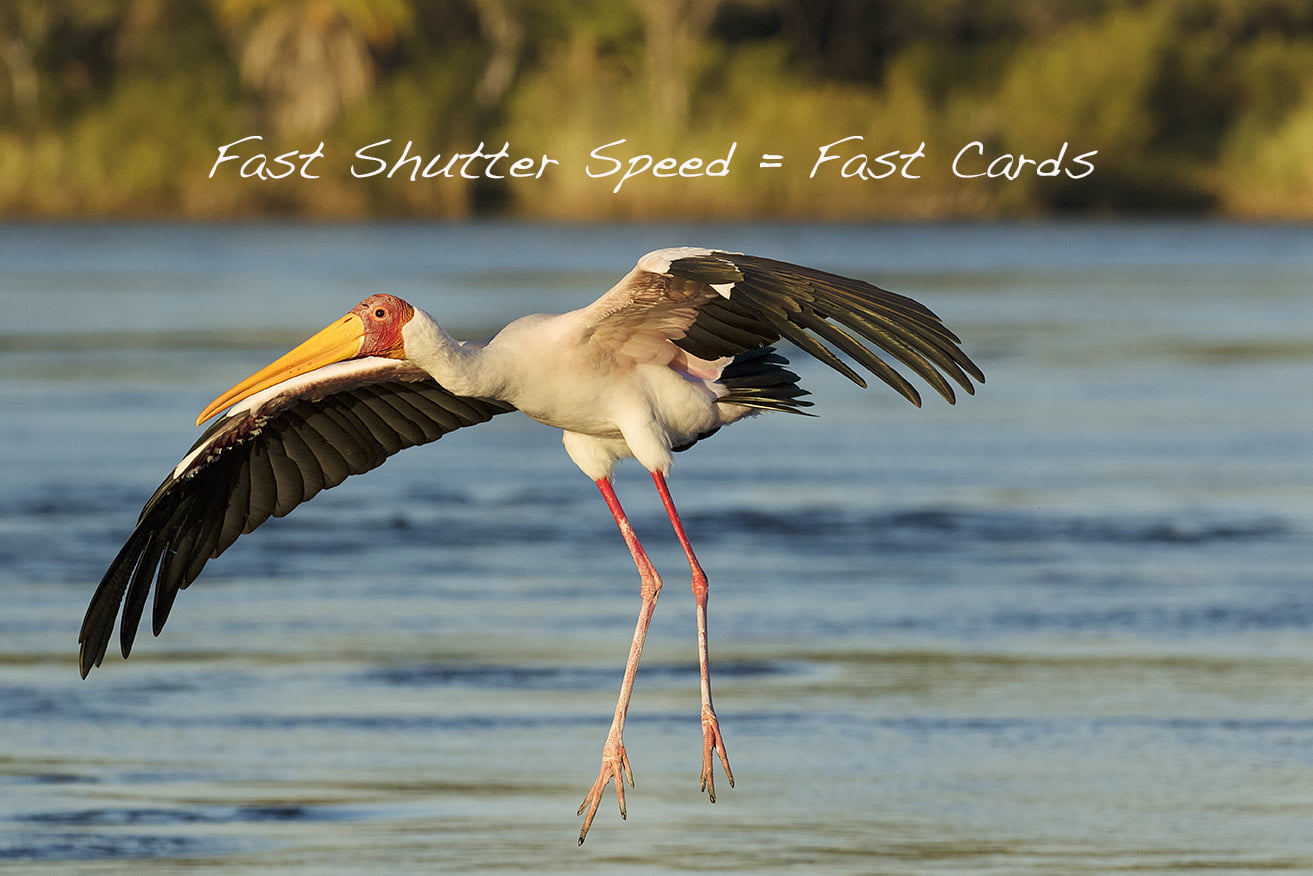
Freezing the moment with birds it is important that your camera has the shutter speeds capable of this . The next thing is that you need a fast memory card that will capture the action and write to the card as fast as you take the pictures.

Some people make the mistake of having a good camera, great lens and sadly don’t have a fast memory card that will keep up with the frame rate of the camera.
If you are taking many frames a second and the card starts to slow down, then that card is not suitable for the camera that you have for capturing in burst modes or in fast shutter rates. Do your homework well.
For any wildlife photography the zoom range that you need is a minimum 300mm. That’s your starting point.
Happy bird shooting, these are just a few tips to guide you in your bird photography.
 Beautiful Panoramic Landscape Photographs, Post Cards, Greeting Cards, Bookmarks and more available for purchase online now.
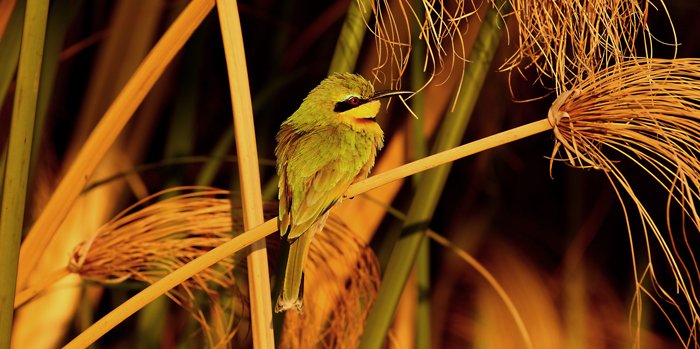
 Stay up to date with our photography workshops and tour dates